Learn Best Methods to Fix Beginning Balance Issues in QuickBooks Desktop

This occurs if the account is set up with an incorrect or zero balance. Or if adjustments were made to a transaction that had previously been cleared and reconciled. This blog will
critically focus on methods to fix beginning balance issues in QuickBooks Desktop.
Methods to Fix Beginning Balance Issues in QuickBooks Desktop
There are several ways to fix beginning balance issues in QuickBooks Desktop. Refer to the below methods and detailed steps to fix this issue and get your work started as soon as possible.
Method 1: Correcting A Zero Balance
If the account balance is negative, you must create the opening credit once again. However, you cannot select this in the "begin reconciliation" menu; you can make a notation in your journal and perform a quick reconciliation to rectify the situation.
Step 1: Firstly, make a journal entry by inputting the date and amount. Follow the below instructions:
Navigate towards the “Company” option and choose “Make General Journal Entries.”
Alter the dates to the statement date, which is imported from the starting balance.
Choose the proper account and proceed with the list of account
Input the appropriate opening balance in the debit section
In the following line, select “Opening Balance Equity.”
Now, choose the “Save” option to apply changes.
Step 2: Execute the mini reconciliation to appropriate the starting balance in the window. Follow the step-by-step process as below mentioned:
Choose the “Banking menu” and navigate toward the “Reconcile” option
Select an appropriate account from the list of menu
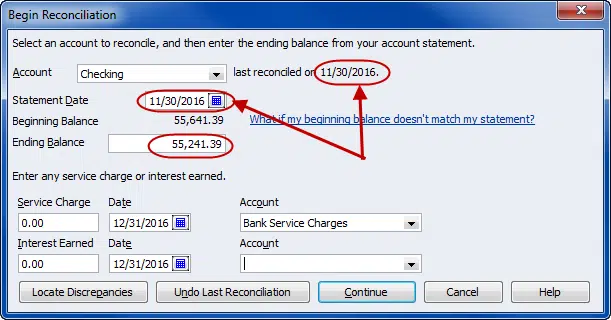
Enter the statement date and last balance
Proceed by clicking “Continue.”
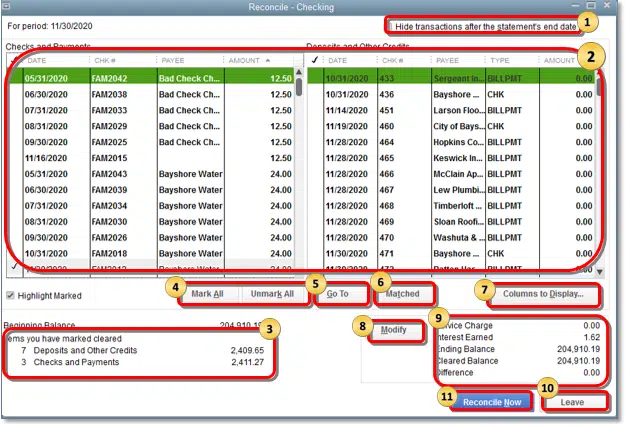
Next, choose the journal entry in the “Deposits and other credits” tab
In this step, ensure the difference amount should be “0.”
Finish this step by choosing the “Reconcile Now” option.
This method should ensure you’ve successfully executed the process to fix beginning balance issues in QuickBooks Desktop and that it is resolved. However, if your concern is correcting an incorrect balance, refer to the below method.
Method 2: Correcting an Incorrect Balance
Another method is to correct an incorrect balance by following the below steps:
Step 1: Run Reconcile Discrepancy Report
Navigate towards “Reports Menu” and select “Banking.”
In the next step, choose “Reconciliation Discrepancy.”
Now, choose the proper account and proceed by clicking “OK.”
Once done, you’ll have a list of transactions which modified since the last reconciliation
Refer to the “Use this report” tab to locate the triggering issue
Once you spot the triggering issue, note the “Transaction Date” and “Last Modified Date.” This will ensure the date when the modification was done.
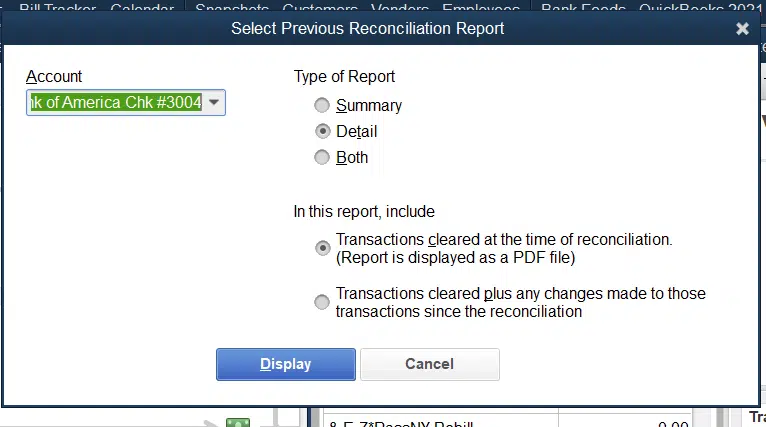
Step 2: Verify Audit Trail Report
Navigate towards the “Reports” menu and select the “Banking and Previous Reconciliation” option
Choose the proper account that needs to be reconciled
Select the latest statement date and go to “Transactions Cleared,” and select the “Display” option
Note the statement and the date of creation of the reconciliation
Proceed by clicking on the “Reports” tab and choosing “Accountant and Taxes.”
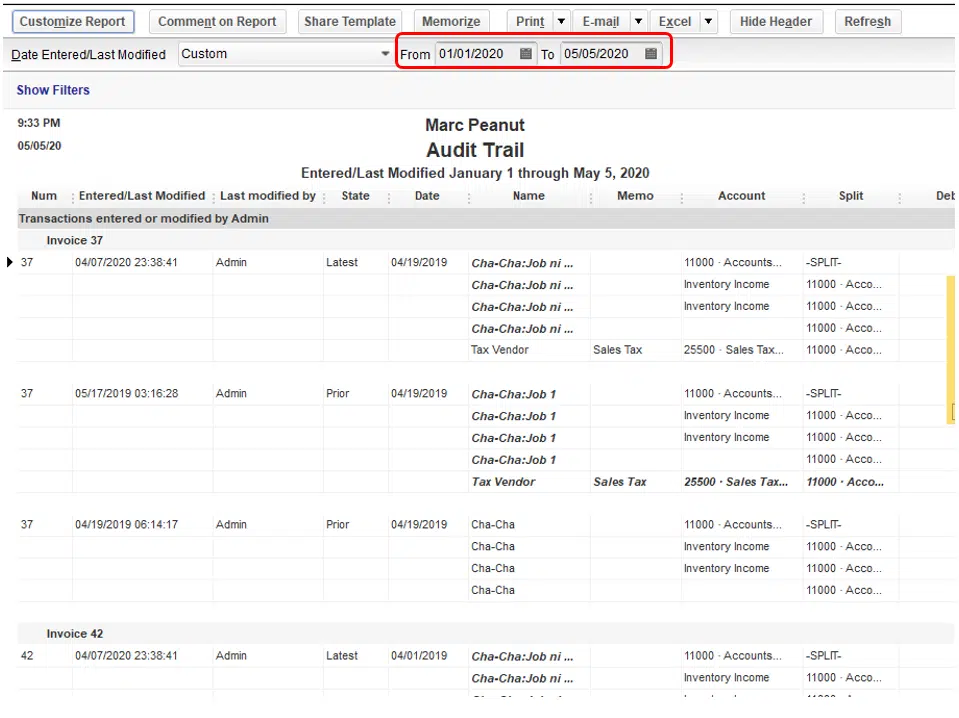
Also, ensure you choose “Audit Trail Report.”
Select the “Customise Report” option
Move ahead by clicking the “Filters” option and filter the account from the options.
Proceed to the “Display” option and set the “Date Filter” by setting it to the “from” field blank “to” to the statement date
Once done, select the “OK” option.
Set the from date to the previous PDF reconciliation creation date and the to date to today.
Ensure transactions in the “Report Account” for the issue
Step 3: Earlier Reconciliation Report
Navigate to the “Reports” tab and choose “Banking and Previous Reconciliation.”
Select the proper account and ending date of the statement
Next, choose the “Display” option
Note the differences between the previous statements and the financial institution.
Conclusion
Hopefully, this blog will fix your system's beginning balance issues in QuickBooks Desktop. We’ve focused on explaining these solutions as simply as we could. In case you require additional technical assistance, seek professional QuickBooks technical assistance to assist you.


Comments
Post a Comment